Micro SD Card Replacement

Step-by-step instructions


- Click here for help with General Install -

Locate the Radio Box

The Radio Box is about the size of a deck of cards. Sometimes it is helpful to follow the RCA wires from the amplifier to find the unit.
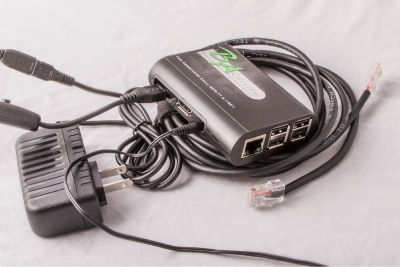
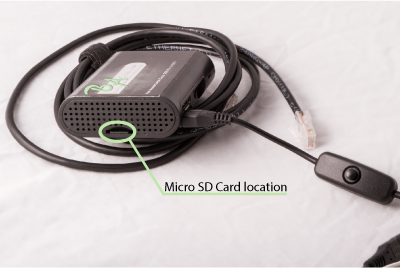
Radio Box

Locating & Removing the Card

The SD Card is located on one of the shorter sides of the box. (not the side with the USB ports)

Removing the Card

  1. Before removing the Micro SD Card unplug the power cord. The power cord is the micro USB cable, commonly referred to as an Android charging cable.
  2. You can also unplug the other two wires to make the job a little easier.
  3. Turn the unit upside down. On the Card there is a small ridge that you can catch with your fingernail to side the card out. On some of our radio boxes, you will need to use something small to slide between the bottom of the casing and the card in order to catch the ridge on the card. A paper click or even a co-worker with longer fingernails will do the trick.
  4. As you remove the Micro SD Card, play close attention to the direction of the card. You will need to install the new on in the same direction.

Install and Power up

Install the new Micro SD Card in the same direction as the one you removed. While inserting the card the metal connections must be facing the motherboard. Take care to insert the card into the hanger - There is a small metal hanger that the card MUST slide into or it will fall inside the radio box.

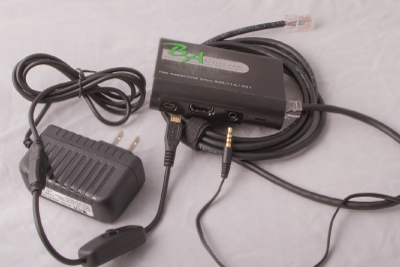
Once the card is in place reconnect the power and any other cables removed. There should be 3 cords plugged into the unit, reference image. It will take about 60 seconds for the radio to boot up and start playing music.
IMPORTANT: Once the music is playing please call or text Emily @ 916.257.8446 and let her know the music is working. For any technical support please contact Emily.

Contact Info:

Emily: 916.257.8446 or

Will: 309.714.1921

Email: willb@baotics.com